

Lubing your keyboard switches is the single best modification you can make to improve typing feel and sound. A well-lubed switch is smoother, quieter, and more satisfying to press than a stock switch.
But it’s also intimidating — opening up dozens (or hundreds) of tiny switches and applying lubricant by hand. Here’s the truth: it’s actually not that hard, and the results are transformative.
Why Lube Your Switches?
· Smoother feel — Eliminates scratchiness in stock switches
· Quieter operation — Dampens spring ping and stem friction
· Deeper sound — Reduces high-frequency noise, giving a “thockier” acoustic profile
· Better consistency — Every switch feels the same
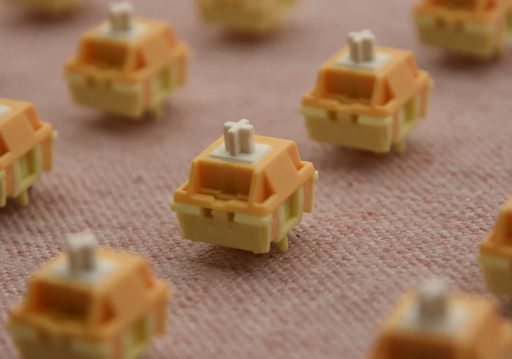
Stock switches from manufacturers like Gateron and Cherry come with minimal factory lubrication (if any). Even “pre-lubed” switches benefit from additional hand-lubing.
What You’ll Need
Essential Tools
· Switch opener — A dedicated switch opener tool (around $5–10)
· Small brush — 1–2mm flat brush for applying lubricant
· Lubricant — Krytox 205g0 (for linear/tactile stems) and Super Lube (for springs)
· Keycap puller — To remove keycaps
· Switch puller — To remove switches (if hot-swap)
· Tweezers — For handling small parts
· Container — Trays to keep parts organized
· Gloves — Optional, but keeps oil off your switches
The Lubes
| Lube Type | Best For | Why |
| Krytox 205g0 | Linear switches (stem/housing) | Thick and smooth; eliminates scratch |
| Krytox 105 | Springs | Thin oil that doesn’t gunk up |
| Tribosys 3204 | Tactile switches (stem/housing) | Thinner than 205g0, preserves bump feel |
| GPL 105 | Springs | Standard spring oil |
| Super Lube | Stabilizers | Thick grease for wire rattle |
Don’t mix lubes between parts — Use 205g0 (or 3204) for the stem and housing, and 105 (or similar thin oil) for the springs.
Step-by-Step Lubing Process
Step 1: Remove the Keycaps
Use a keycap puller to carefully remove all keycaps. Store them in order so you know where they go later.
Step 2: Remove the Switches
If your keyboard is hot-swappable, use a switch puller to remove each switch. Gently wiggle and pull straight up. If your board is soldered, skip to… well, you can’t easily remove soldered switches without desoldering.
Step 3: Open Each Switch
Use your switch opener to pry open the switch housing:
1. Insert the switch into the opener
2. Push down gently until the top housing clips disengage
3. Lift the top housing and remove the spring and stem
Pro tip: Work in batches of 10–15 switches at a time. Don’t open all 60+ at once unless you have a lot of trays.
Step 4: Lube the Springs
Dip a brush into your thin spring oil (Krytox 105) and apply a tiny amount to one end of each spring. Spread it evenly. Set the lubed springs aside on a clean surface.
Don’t overlube — Excess oil will pool at the bottom of the switch housing and attract dirt.
Step 5: Lube the Stem
This is the most important step. Use Krytox 205g0 (or Tribosys 3204 for tactile switches).
Apply a thin, even layer to:
4. The side rails of the stem (the vertical sliding surfaces)
5. The stem pole (the center column that goes into the spring)
6. The sliders on the side of the stem (small plastic tabs)
For tactile switches: Don’t lube the tactile leaf contact point — it will reduce or eliminate the tactile bump.
Step 6: Lube the Housing
Apply a thin layer of 205g0 to:
7. The inside rails of the bottom housing (where the stem slides)
8. The spring seat (circular depression in the bottom housing)
Don’t lube the metal contact leaves — It can cause electrical issues.
Step 7: Reassemble
9. Place the spring in the bottom housing
10. Insert the stem on top of the spring
11. Snap the top housing back on
12. Press firmly until you hear the clips engage
Test each switch by pressing the stem. It should feel smooth and quiet. If it feels scratchy, you missed a spot.
Step 8: Reinstall and Enjoy
Place the lubed switches back into your keyboard (press firmly until they click in), then reattach the keycaps.
How Long Does It Take?
| Number of Switches | Beginner | Experienced |
| 10 (macropad) | 20–30 minutes | 10–15 minutes |
| 61 (60% board) | 2–3 hours | 45–90 minutes |
| 87 (TKL) | 3–4 hours | 1–2 hours |
| 104 (full-size) | 4–6 hours | 1.5–3 hours |
Yes, it’s time-consuming. But it’s also meditative, and the result is a keyboard that feels better than any stock board you can buy.
Common Mistakes
❌ Too Much Lube
This is the #1 mistake. Thin coats are better than thick ones. Too much lube will make switches feel sluggish or “mushy.” If lube is visibly pooling, wipe it off and start over.
❌ Lubing the Wrong Parts
Metal contact leaves should never be lubed. The tactile bump mechanism should not be lubed on tactile switches. These are precision parts that need friction to work properly.
❌ Skipping the Springs
Unlubed springs “ping” — a metallic ringing sound that’s especially noticeable on larger keys. A tiny bit of oil on each spring eliminates this entirely.
❌ Mixing Lube Types
Don’t use thick grease on springs or thin oil on stems. Stick to the recommended lube for each part.
Do I Need to Lube? Can’t I Just Buy Pre-Lubed Switches?
Factory “pre-lubed” switches vary wildly in quality. Some are genuinely good (Gateron Oil Kings, Durock POMs, Tecsee Purple Pandas). Others have barely any lube at all.
If you want the best possible feel, hand-lubing is still superior to factory lube. A $0.30 switch hand-lubed with Krytox will feel smoother than a $1.00 switch with factory lube.
That said, if you don’t want to spend 3 hours lubing, reputable pre-lubed switches from Durock, Tecsee, and Gateron are an excellent compromise.
Should You Lube Linear, Tactile, or Clicky Switches?
· Linear: 100% yes — the improvement is dramatic
· Tactile: Yes, but be careful not to overlube the tactile bump (use Tribosys 3204, not 205g0)
· Clicky: Generally not recommended — lube can dampen or remove the click mechanism
____________________________________________________________
*Ready to start your lubing journey? Check out our keyboard switches collection and start building your perfect setup.*